Sunday, June 29, 2008

Strawberries & Kiwi Photomosaic -Completed!

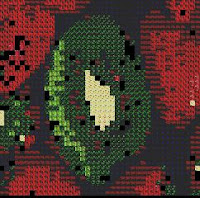
ALL DONE!!! Results from the creation of the fruit photomosaic! YES! YES! YES!


After struggling for hours trying to figure out where my one little and annoying error hid, I am relieved and excited that my fruit photomosaic worked. Thanks to Saajida who helped me to realized that one of my 10 images that I used below had reverted back to the original size. I'm telling you Octave loves playing games. However, I am very pleased with this image. Now, that I know how to create photomosaics, I am eager to create a family photomosaic ...that is when I have some free time!


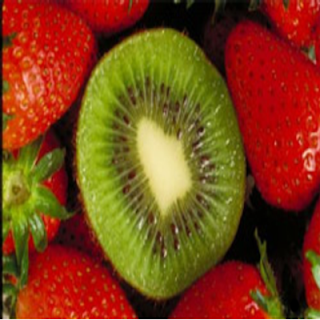
Step 1: Original Image (400x400)

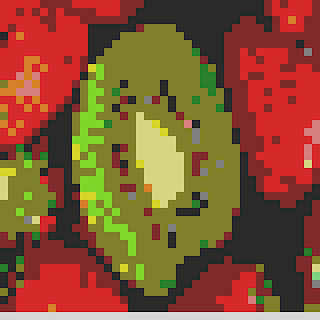
Step 2: I shrunk and enlarged my original image and then I reduced the image to 27 colours. This part was easy!
Step 3: The 10 Images Used
All 10 images had to be resized and saved as ".png" file. This probably took the most time. My photomosaic did not require all 27 possible colours therefore, I only selected colour images that were need in my image of strawberries and kiwi. I tried to display the photos in a nice, uniform order unfortunately, the same image that game me problems in the photomosaics, continued to produce errors when placing it into a matrix for display. Here are the 10 images that I used to produce my fruit photomosaic.



Step 4: Octave Commands
M(:,:,1)=ones(10);M(:,:,2)=ones(10);M(:,:,3)=ones(10);M1=imread("black2.png");M2=imread("green4.png");M3=imread("burgundy3.png");M4=imread("purple3.png");M5=imread("huntergree3.png");M6=imread("green_beans3.png");M7=imread("rose3.png");M8=imread("pink3.png");M9=imread("banana3.png");M10=imread("pineapple4.png");M11=[M1,M2,M,M,M,M,M,M,M,M3,M,M4,M5,M,M,M6,M,M,M7,M,M,M,M8,M,M9,M10,M];M41(:,:,1)=42;M41(:,:,2)=42;M41(:,:,3)=42;M42(:,:,1)=42;M42(:,:,2)=42;M42(:,:,3)=128;M43(:,:,1)=42;M43(:,:,2)=42;M43(:,:,3)=214;M44(:,:,1)=42;M44(:,:,2)=128;M44(:,:,3)=42;M45(:,:,1)=42;M45(:,:,2)=128;M45(:,:,3)=128;M46(:,:,1)=42;M46(:,:,2)=128;M46(:,:,3)=214;M47(:,:,1)=42;M47(:,:,2)=214;M47(:,:,3)=42;M48(:,:,1)=42;M48(:,:,2)=214;M48(:,:,3)=128;M49(:,:,1)=42;M49(:,:,2)=214;M49(:,:,3)=214;M50(:,:,1)=128;M50(:,:,2)=42;M50(:,:,3)=42;M51(:,:,1)=128;M51(:,:,2)=42;M51(:,:,3)=128;M52(:,:,1)=128;M52(:,:,2)=42;M52(:,:,3)=214;M53(:,:,1)=128;M53(:,:,2)=128;M53(:,:,3)=42;M54(:,:,1)=128;M54(:,:,2)=128;M54(:,:,3)=128;M55(:,:,1)=128;M55(:,:,2)=128;M55(:,:,3)=214;M56(:,:,1)=128;M56(:,:,2)=214;M56(:,:,3)=42;M57(:,:,1)=128;M57(:,:,2)=214;M57(:,:,3)=128;M58(:,:,1)=128;M58(:,:,2)=214;M58(:,:,3)=214;M59(:,:,1)=214;M59(:,:,2)=42;M59(:,:,3)=42;M60(:,:,1)=214;M60(:,:,2)=42;M60(:,:,3)=128;M61(:,:,1)=214;M61(:,:,2)=42;M61(:,:,3)=214;M62(:,:,1)=214;M62(:,:,2)=128;M62(:,:,3)=42;M63(:,:,1)=214;M63(:,:,2)=128;M63(:,:,3)=128;M64(:,:,1)=214;M64(:,:,2)=128;M64(:,:,3)=214;M65(:,:,1)=214;M65(:,:,2)=214;M65(:,:,3)=42;M66(:,:,1)=214;M66(:,:,2)=214;M66(:,:,3)=128;M67(:,:,1)=214;M67(:,:,2)=214;M67(:,:,3)=214;M12=[M41,M42,M43,M44,M45,M46,M47,M48,M49,M50,M51,M52,M53,M54,M55,M56,M57,M58,M59,M60,M61,M62,M63,M64,M65,M66,M67];M13=imread("fruit3.png");s=10;for i=1:10:400;for j=1:10:400for m=1:27;if M13(i,j,:)==M12(1,m,:);M13(i:i+s-1,j:j+s-1,:)=M11(1:10,(m-1)*s+1:m*s,:);end;end;end;end;
imshow(double(M13)/255);

Sunday, June 22, 2008

Brightness and Contrast

Project 1:

The following image is of a darkroom. It is virtually impossible to see anything.

Through the use of GIMP, I was able to change the brightness of the image by using colours and then going to curves in the GIMP program.


In the following image, I changed the constrast. Although it is still fairly blurry, one can see the room, countertop and the device box on top of the countertop. I'm assuming the box is where the film is processed??? You can see that the door to the box is opened. Pretty cool! Now let's see if I can do the same in Matlab??????

Saturday, June 21, 2008

Photomosaic Mickey Mouse

Step 1:
After reviewing many, many images, I have decided to use the Mickey Mouse image. This image provided a lot of contrast which I believe will define the colours more easily.
The size of the original image is 425, 300, 3.


Step 2:
I reduced the image by a factor of 0.1 using the nearest neighbour method. After speaking to my buddy, Saajida, and reviewing the dicussion board in facebook, I decided to save all my images with a '.png' extensions.
The reduced size of this image is 42,30,3.


Step 3:

I enlarged my shrunken image in step 2 by double the original size.
The enlarged image size is 840, 600,3.


Step 4:

I have reduced my image to 27 colours using the following command: B=floor(double(A)/86)*86+42;

My image surprised me. The original white background displays a grey tone when I reduced the colours. Furthermore, there were not many significant colour change. The reduced colour looks very similar to the original colours.


Since there didn't seem a huge change in the colour tones I reduced the colour of my original sized image. As you can see there is not a lot of change. I believe this occurred because my image displays more of the primary colours.


Original image reduced to 27 colours


Step 5:


Here are the 27 possible colours. They are in reverse starting with colour(214,214,214....42,42,42). I was fooling around with the various colours and although the colours are not displayed in a nice template form, I thought it would be foolish to redo the colours since the colours are visible. Now the fun begins....

Step 6:

Collecting images.....
I originally had different Walt Disney characters, but with varying image sizes and skewing the rows and columns didn't help. So I decided after days of work, I would try using one image in 27 different colours.

Step 7
Replacing the small images into the large image. Well, not what I expected. I'm not too sure why the image turned out the way it did. I have been on the computer for 14 hours and I have tried to resolve the problem,. I have even tried to replace the large image of Mickey with different images. I still get straight lines throught my image. My other thought was that perhaps there is something in the image that I could not see and in fact the pixels are being replaced properly. Either way after all that work, I was very disappointed with the results. I am going to try another one. Octave commands for this image are listed below.

OCTAVE COMMANDS USED

cd c:\users\tim\pictures
M((,:,1)=ones(10);M(:,:,2)=ones(10);M(:,:,3)=ones(10);

M1=imread("lion2(42,42,42).png");M11=floor(double(M1)/86)*86+42;M2=imread("lion2(42,42,214).png");M12=floor(double(M2)/86)*86+42;M3=imread("lion2(128,42,42).png");M13=floor(double(M3)/86)*86+42;M4=imread("lion2(214,42,42).png");M14=floor(double(M4)/86)*86+42;M5=imread("lion2(214,128,42).png");M15=floor(double(M5)/86)*86+42;M6=imread("lion2(214,214,42).png");M16=floor(double(M6)/86)*86+42;M7=imread("teresa.png");

M8=[M11,M,M12,M,M,M,M,M,M,M13,M,M,M,M,M,M,M,M,M14,M,M,M15,M,M,M16,M,M7];
M41(:,:,1)=42;M41(:,:,2)=42;M41(:,:,3)=42

M42(:,:,1)=42;M42(:,:,2)=42;M42(:,:,3)=128;

M43(:,:,1)=42;M43(:,:,2)=42;M43(:,:,3)=214;

M44(:,:,1)=42;M44(:,:,2)=128;M44(:,:,3)=42;

M45(:,:,1)=42;M45(:,:,2)=128;M45(:,:,3)=128;

M46(:,:,1)=42;M46(:,:,2)=128;M46(:,:,3)=214;

M47(:,:,1)=42;M47(:,:,2)=214;M47(:,:,3)=42;

M48(:,:,1)=42;M48(:,:,2)=214;M48(:,:,3)=128;

M49(:,:,1)=42;M49(:,:,2)=214;M49(:,:,3)=214;

M50(:,:,1)=128;M50(:,:,2)=42;M50(:,:,3)=42;

M51(:,:,1)=128;M51(:,:,2)=42;M51(:,:,3)=128;

M52(:,:,1)=128;M52(:,:,2)=42;M52(:,:,3)=214;

M53(:,:,1)=128;M53(:,:,2)=128;M53(:,:,3)=42;

M54(:,:,1)=128;M54(:,:,2)=128;M54(:,:,3)=128;

M55(:,:,1)=128;M55(:,:,2)=128;M55(:,:,3)=214;

M56(:,:,1)=128;M56(:,:,2)=214;M56(:,:,3)=42;

M57(:,:,1)=128;M57(:,:,2)=214;M57(:,:,3)=128;

M58(:,:,1)=128;M58(:,:,2)=214;M58(:,:,3)=214;

M59(:,:,1)=214;M59(:,:,2)=42;M59(:,:,3)=42;

M60(:,:,1)=214;M60(:,:,2)=42;M60(:,:,3)=128;

M61(:,:,1)=214;M61(:,:,2)=42;M61(:,:,3)=214;

M62(:,:,1)=214;M62(:,:,2)=128;M62(:,:,3)=42;

M63(:,:,1)=214;M63(:,:,2)=128;M63(:,:,3)=128;
M64(:,:,1)=214;M64(:,:,2)=128;M64(:,:,3)=214;
M65(:,:,1)=214;M65(:,:,2)=214;M65(:,:,3)=42;
M66(:,:,1)=214;M66(:,:,2)=214;M66(:,:,3)=128;

M67(:,:,1)=214;M67(:,:,2)=214;M67(:,:,3)=214;

M9=[M41,M42,M43,M44,M45,M46,M47,M48,M49,M50,M51,M52,M53,M54,M55,M56,M57,M58,M59,M60,M61,M62,M63,M64,M65,M66,M67];

M10=imread("mic3.png");
s=10;

for i=1:10:840;

for j=1:10:600;

for m=1:27;

if M10(i,j,:)==M9(1,m,:);

M10(i:i+s-1,j:j+s-1,:)=M8(1:10,(m-1)*s+1:m*s,:);

end; end; end; end;

imshow(double(M10)/255);

Well, I thought I would try my original image (strawberries and kiwis). I also decided to struggle through resizing different images to replace into my fruit image. Well, sad to say, I ran into another brick wall. I hoping to resolve this problem very soon also!

Thursday, June 12, 2008

Assignment 10 "Unswirl Stars" (Optional)

Who are these STARS????


Octave Codes
function [outpic]=swirl(inpic,r,gamma);
inpic=double(inpic);
gamma=gamma*pi/180;
cx=size(inpic,1)/2;
cy=size(inpic,2)/2;
for x=1:size(inpic,1);
for y=1:size(inpic,2);
d=sqrt((x-cx)^2+(y-cy)^2);
if (d>r) (d<1);>cy;
theta=acos((x-cx)/d);
else;
theta=-acos((x-cx)/d);
end;
fr=((d/r)^2*(1-d/r)^2)*16;
newx=d*cos(theta+gamma*fr)+cx;
newy=d*sin(theta+gamma*fr)+cy;
rp=floor(newx);
s=floor(newy);
for k=1:3;
outpic(x,y,k)=[1-newx+rp,newx-rp]*[inpic(rp,s,k),inpic(rp,s+1,k);inpic(rp+1,s,k),inpic(rp+1,s+1,k)]*[1-newy+s;newy-s];
end;
end;
end;
end;
end;
A=imread('star1.jpg');
B=swirl(A,180,-540);
imshow(double(B)/255);

Jennifer Aniston

Fabio (r=150, gamma=540)

Tuesday, June 10, 2008

Assignment #9

Original Pictures from Assignment 6 #3 part c
Picture1
Picture2

Question 1: Method 1: Convert images to images with only 64 colours
A=imread('picture1.jpg');
B=floor(double(A)/64)*85;
imshow(B/255);
Picture1
Picture2

Question 1: Method 2: Convert images to images with only 64 colours
A=imread('picture1.jpg');
B=floor((double(A)+42)/85)*85;
imshow(B/256);
Picture1
Picture2


Question 2: Method 1: Convert images to images with only 27 colours
A=imread('picture1.jpg');
B=floor(double(A)/85)*128;
imshow(B/256);
Picture1
Picture2

Question 2: Method 2: Convert images to images with only 27 colours
A=imread('picture1.jpg');
B=floor((double(A)+64)/128)*128;
imshow(B/256);
Picture1
Picture2

Question 3: Convert images to greyscale images
A=imread('picture1.jpg');
B=(A(:,:,1)+A(:,:,2)+A(:,:,3))/3;
imshow(B);
Picture1

Picture2

Question 4: Greyscale image with only 64 intensity values
A=imread('picture1.jpg');
B=(A(:,:,1)+A(:,:,2)+A(:,:,3))/3;
C=floor(B/4)*4;
imshow(C);
Picture1: is very faint!

Picture2: gave me a white image only!
Question 5: Greyscale image with only 16 intensity values
A=imread('picture1.jpg');
B=(A(:,:,1)+A(:,:,2)+A(:,:,3))/3;
CC=floor(B/16)*16;
imshow(CC);
Picture 1
Picture2 Very faint image.

Sunday, June 8, 2008

Assignment 8 Question 5

function [smallimage] = shrink2( picture, f )
Mp = floor(size(picture,1)*f);
Np = floor(size(picture,2)*f);
smallimage(:,:,1)=zeros(Mp,Np);
smallimage(:,:,2)=zeros(Mp,Np);
smallimage(:,:,3)=zeros(Mp,Np);
for i = 1:(Mp-1);
for j = 1:(Np-1);
a=round(i/f);
b=round(j/f);
smallimage(i+1,j+1,:)=picture(a+1,b+1,:);
end;
end;
endfunction;

Octave commands:
A=imread('blueyellow.jpg');
pic1=shrink2(pic,0.2);
pic2=shrink2(pic,0.4);
pic3=shrink2(pic,0.6);
pic4=shrink2(pic,0.8);
A(52:460,77:690,:)=pic4;
A(103:409,154:613,:)=pic3;
A(154:357,231:537,:)=pic2;
A(205:306,308:460,:)=pic1;
imshow(double(A)/255);


Assignment 8 Question 4

After reviewing both methods ('nearest neighbour' and 'bilinear interpolation approximation'), I found it difficult to compare my 2 pictures because picture1 was very dark to begin with and picture2 had a fairly uniform blue colour. The spectrum was very colourful therefore, based on the images I did produce it was clear to me that 'bilinear interpolation approximation' method was much better. It had better constract and it seems to show a better and smoother transition between the colours. The colours seemed to flow much better as evident in the spectrum image especially.

According to Chapter 2 in the text, p. 67, although, bilinear interpolation gives a more favourable image when compared to the original. Programs such as GIMP and Photoshop must work in bicubic interpolation which yields a higher contrast and smoother colour transition than bilinear interpolation when compared to the original image.

Assignment 8 Question 3

function [smallimage]=enlarge3(picture,f);
picture=double(picture);
Mp=floor(size(picture,1)*f);
Np=floor(size(picture,2)*f);
for i=0:(Mp-1);
for j=0:(Np-1);
a=(i/f);
b=(j/f);
r=floor(a);
s=floor(b);
if (r>0) & (r<256)>0) & (s<256); for k=1:3; smallimage(i,j,k)=[1-a+r,a-r]*[picture(r,s,k),picture(r,s+1,k); picture(r+1,s,k), picture(r+1,s+1,k)]*[1-b+s; b-s]; end; end; end; end; endfunction;

From assignment 7 spectrum.jpg (f=0.75) size(80 149 3)
(f=1.25) size(99 185 3)


(f=0.25) size(26 49 3)

(f=2) size (51 97 3)

(f=0.1) size(9 19 3)

(f=2) size(17 37 3)


From assignment 7 picture1.jpg
(f=0.75) size (112 119 3)

(f=1.25) size (139 147 3)

(f=0.25) size (36 39 3)

(f=2) size (71 77 3)

(f=0.1) size (14 15 3)

(f=2) size( 27 29 3)


From assignment 7 picture2.jpg
(f=0.75) size (116 119 3)


(f=1.25) size(144 147 3)


(f=0.25) size(38 39 3)

(f=2) size (75 77 3)


(f=0.1) size (14 15 3)


(f=2) size (27 29 3)